It's 6:00 am, and I can't sleep. It has been raining almost non-stop since early Saturday morning. We stayed up until midnight on Friday trying to set up a little greenhouse to protect Michelle's green beans from the
imminent dropping temperature. As we neared the completion of the project, and noticed the impending rainstorm approaching, we realized that our greenhouse design has some inherent flaws (mostly relating to the capture of rain on top of the plastic). How do we keep the rain from pooling on the short
side of the plastic and eventually ripping, tearing or damaging the
greenhouse. We have come up with several brilliant ideas so far:
1) Design evolution. As we built the greenhouse we suspected the rain pooling to be a problem so we shortened the distance between the apex (peak) of the roof and it's short side. This would limit the surface area potentially at risk.
2) Support. We used twine to attach from the fence to the ridge pole. This would then provide a measure of support to the plastic and would limit the areas of pooling by maintaining high spots every few feet. In addition, we extended the twine to the ground on the opposite side to provide an added measure of stability to the structure.
3) Tension. We concluded that if we keep the plastic tight enough that the rain would simply drain and no puddling would ever occur.
4) Tension support. We suspected there may have been some
inaccuracy in our measurements, plastic measurements, fitting of our frame, etc., which caused slight dips in our otherwise perfect design. We were able to correct a measure of the error by pulling some of the excess plastic and taping it with duct tape. This helped, in a
measure, to restore the tension. (This was done after it was already raining and puddling has started to occur. Michelle had me hold the umbrella over the work area while she dried the plastic with a rag enough to attach the duct tape.)
 5. Mid-structure support. When the tape failed to eliminate the pooling Michelle added additional supports in the middle of the plastic, at regular intervals, to create a steeper run-off which would help eliminate low spots and would allow the rain to drain. She used some left-over gardening sticks (from a previous garden) to push the plastic up. The concern with these poles was that they are thinner and since they are essentially just sticks we were concerned that if enough water managed to pool, these poles may just poke through the plastic.
 6. More Mid-structure support. If one pole doesn't work try more. The pooling continued so Michelle added additional poles. It seemed to work but we now realize that it was a slow down in the rain that gave us that false sense of accomplishment.
 Now it is 6:00 am and raining again and it is raining pretty constantly. I woke up to the sound of the rain and then I realized another solution to the dilemma of the pooling water. Add drains. We've been able to determine where the water is most likely to pool. Since those spots are the obvious low spots, we can just add drain spouts in those spots which would allow the water to drain instead of just collecting and pooling. The idea is simple, the design a little more complicated but my current thought is that we can poke a hole at the bottom of the pooled water area (after draining the water), insert a straw, extend the straw through the plastic side wall, and "seal" the 2 holes with duct tape. The straw will allow the water to drain below the side support and would be positioned to drain the greatest amount of water without creating a place for the heat to escape the greenhouse. I'll have to try it when it gets light outside.


 Michelle finished before the boys could completely clean up the yard. As you can tell by the shadows, it was nearly 7:30 pm before we starting thinking about dinner! The boys started getting pretty ornery but we had them all in bed before 9:30 with showers and bathes. Ok, not a world record but it's summer, right?!
 Michelle finished before the boys could completely clean up the yard. As you can tell by the shadows, it was nearly 7:30 pm before we starting thinking about dinner! The boys started getting pretty ornery but we had them all in bed before 9:30 with showers and bathes. Ok, not a world record but it's summer, right?!


 We feel quite fortunate to have some wonderful friends. We were able to borrow a roto-tiller to get the soil mixed and ground tilled and ready for planting. Actually, this is just the tilled part. We still have to make the rows, lay down the watering system and get support fencing installed before we're really ready for this growing season.


 Of course the temperature outside has gotten quite hot. So we decided that the best time to pick the produce was after we put the boys down for bed. We witnessed a beautiful sunset as we finished picking the beans.
 I just think it is so cool that we are raising so much good food for our family. And I am very relieved to say that our garden is still going strong.
 Michelle has been quite excited with the beans and corn. They are growing very well and we are so excited to have these fresh vegetables although it will still be a few weeks before they are producing anything.
 The peas are starting to come along...
 And the cauliflower is nearly ready to harvest.
 And the broccoli too...
 The beans and corn were planted later but it is coming up now.
 Isn't this a beautiful sight!
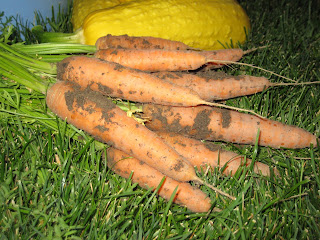
 Everything seems to be growing as it should, except the bulb onions. They haven't really even started growing. But we've had to thin the carrots and we've produced more lettuce than Michelle can eat (she tries to get the rest of the family to help her but we just aren't quite as excited as she is).
 The 2nd half of the garden was just barely planted and it looks like it is coming up nicely as well. This half of the garden is more of the summer plants. The other half of the garden is the cooler weather crop.
 Michelle has engineered her own special watering system. The main line is on a automatic timer and then each individual line has a manual shut-off valve to make sure that each row only gets the right amount of water. Of course there isn't anything we can do about all the rain we are getting (so the automatic watering system has been turned off).


 But he's not sure what to do with the pvc pipe
 The boys don't want to be left out of the fun
 The frame has been assembled
 Michelle is sewing the plastic together
 Staking down the plastic for the finishing touches
 Completed just before midnight
 1) Everything started great, getting the garden tilled and prepared (we even added compost from the city green recycling center). But just to make sure that the soil was just right Michelle added some slow release fertilizer (with weed
  2) Now that we had the garden sprouting and growing we wanted to ensure that the plants had enough moisture. Everyone knows that you put grass clippings around the base of your plants (except tomatoes - because you tend to invite little pests) and that helps your plants grow, maintain their moisture, etc. But...grass clipping are a bad idea if you just sprayed the lawn with weed killer! Yes, we killed the garden a second time, except the tomatoes.

 3) Undaunted, Michelle faithfully started over and replanted the garden taking great care not to apply anything with weed killer (we didn't even bother doing the grass thing this time). Things were going great. The corn was shooting up, beans up the fences, squash out of control (just a happy day for my "budding" farmer). And then we noticed that some little bugs were enjoying our garden more than we were! So Michelle started to spray the leaves to kill off the bugs. And then the fateful mistake occurred. Just before leaving on our camping trip for Pioneer Day (July 24) she sprayed the entire garden. The problem was that it was still mid-day, way to hot to apply this particular type of spray. We didn't realize anything until we returned home from a most wonderful experience only to discover the entire garden wilted and brown! Let's just say that it was not a pleasant evening. And what wasn't killed by the bug spray fell over in the big wind storm because the garden was getting watered too much (we were watering the garden on opposite days from the neighbors watering their lawn and the net result was a daily dose of water...equals soggy ground).


